February 27, 2011

We’ve Moved To Our Own Domain!

Hello faithful followers and foodie friends!

We’ve done it! We have finally moved to our own domain, and we couldn’t be more excited about it!

Except for one thing… all of our loyal subscribers–whom we love so so much–got lost in the move! So please, take a second to re-subscribe via email or in a reader at http://www.fromthelittleyellowkitchen.com

You don’t want to miss our newest recipes posted on the new site: Rocky Road Rice Krispy Treats and Mom’s Kickin’ Chili!!

From the Little Yellow Kitchen

-Chrissy & Lauren

February 24, 2011

Jumps-into-your-mouth Chicken Saltimbocca!

So, I had a major prosciutto craving. I’m not even the slightest bit ashamed either because it’s been a while since the two of us have dined together, so it was only right that I rekindle the flame. Yes, I’m still talking about my love for prosciutto.

I had always liked prosciutto, but it wasn’t until I lived in Italy that I really fell in love with the meat. Over there, it’s never just an ingredient, it’s the star of the dish. You can always find a cured hunk of ham leg, bone and all, hanging from butcher shops or local grocery stores, being delicately sliced by request. My homestay mom, Flora, would bring home the best prosciutto crudo (cured ham) and prosciutto cotto (cooked ham), simply paired with mozzarella di bufala (buffalo mozzarella cheese) and a dash of balsamic and oilo nuovo (which is the very freshest olive oil, vibrant green in color).

One day, she asked me what I would like to eat for dinner: mind you, this was a rarity because she cooked what she felt like that day and never took orders ahead of time. So, as I was put on the spot, I tried so hard to think of a dish I really loved, that had not already been prepared before. Little Yellow Note: Flora was a culinary genius and always had a new recipe up her sleeve.

With a huge smile on my face and with such an air of confidence, I blurted out: “Chicken Saltimbocca.” Why you ask?? Well, I hate to admit it, but this prosciutto-topped chicken dish from Buca di Beppo was really delicious, and I wanted the authentic version, straight out of Italy. The only problem was that she had no idea what I was talking about. I forgot to mention that there was a huge language barrier at first, as I spoke no Italian, and they spoke no English. Oh an also, the word saltimbocca means “jumps in the mouth.” No wonder why I got a blank stare when I asked for “chicken that jumps in my mouth!” Apparently, they have a different name for the dish.

I think that night she ended up making prosciutto and cheese panini’s. Clearly not what I asked for, but it was delicious, regardless. I am fairly sure that Flora figured out what I was asking for later in my stay there, as she provided a feast of prosciutto-topped veal. It was close enough. My belly was happy.

Without further adieu, here is one of the most flavorful Italian dishes!

Chicken Saltimbocca:

Salt and pepper the chicken, then wrap each tender in a cozy blanket of prosciutto. Then top with whole sage leaves, although you may want to tuck them in just a tad, to ensure that they stay in place.

Make a plastic wrap envelope and place the chicken inside, spaced apart so that they have room to be tenderized. Don’t be alarmed, they will grow a bit.

Next, lightly dredge in flour and place in the pan with the melted butter and oil combo, sage-side down.

Afer 3-4 minutes, it’s time to flip the chicken cutlets!

Set cooked chicken aside, and prepare the wine shallot sauce. Then arrange the chicken-prosciutto wonderfullness with pretty little lemon slices, drizzle with sauce and EAT!

Ingredients:

  • 6 chicken cutlets (we used 6 chicken tenders)
  • 6 thin slices prosciutto
  • 12 sage leaves, more for garnish
  • 1/2 cup flour
  • 2 tablespoons butter, divided
  • 1 1/2 tablespoons olive oil
  • 1/2 cup dry white wine, a little extra won’t hurt 🙂
  • 1/2 cup organic chicken broth
  • 1/2 shallot, chopped
  • Salt and black pepper
  • 1 Tbsp lemon juice
  • Lemon slices

Directions:

1. Pat each tender dry and sprinkle with a little salt and pepper. Wrap a slice of prosciutto around a chicken tender and tuck in two sage leaves, just enough to keep them in place while cooking. Repeat this step for each of the chicken tenders.
2. Place chicken tenders between a long piece of plastic wrap, and with a rolling pin, gently pound cutlets to an even 1/4-inch thickness. You want to pound the chicken after it is nicely wrapped up in prosciutto and sage, in order to help distribute the flavors and pound the ingredients into the chicken.

3.  Shovel the flour onto a plate and dip the pounded chicken in it, lightly coating each side. Heat a tablespoon of butter and the olive oil in a large pan. When the butter is melted and starts foaming, add the chicken cutlets to the pan, sage-side down. Cook 3 to 4 minutes per side, turning once, until lightly browned, a little crispy and cooked through. Transfer to a plate and cover to keep warm, while making the sauce.

4. Add wine to the hot pan and stir with a wooden spoon to de-glaze the pan. Add in the shallots and a sprinkle of salt and pepper. Let the wine reduce by half, then add the chicken broth and reduce by half again. Turn off the heat and stir in remaining tablespoon of butter (we used a little less than a Tbsp). Pour over the plated cooked chicken cutlets and it’s ready to serve with lemon wedges.

*Little Yellow Note: we crisped up a little more sage to add to the tops of the chicken…we love the extra flavor!

Lemon Garlic Asparagus:

Ingredients:

  • 1/2 lb asparagus
  • 1 clove garlic, minced
  • 1 tsp olive oil
  • 1 Tbsp fresh lemon juice
  • salt & pepper, to taste

Directions:

1. Trim the bottoms of the asparagus. This is easy to to by hand, by snapping off the bottom portion.

2. Heat the oil in a medium pan, add the garlic and cook for a minute. Add the asparagus and stir it up. Squeeze in the lemon and add a dash of salt and pepper, to taste, and you got yourself a simple side-dish!

Multigrain Garlic Crostini:

Ingredients:

  • multigrain loaf–we got ours from TJ’s
  • fresh parmeggiano reggiano cheese, shredded or shaved
  • rosemary, dried or fresh
  • garlic, for rubbing
  • olive oil

Directions:

1. Cut bread into 1 inch thick slices. Drizzle each piece with olive oil and sprinkle with chopped rosemary.

2. Place under the broiler for a few minutes until they look golden and crispy… Keep an eye out for these puppies! They can burn quickly, so stay near the oven to constantly check on them.

3. Take slices of bread out and rub vigorously with garlic. Top with a few shreds of cheese and place back under the broiler for another minute or two, or until desired melted-ness is reached.

4. Serve with meal!

Look! It's quite the balanced meal! Buon appetito!


From the Little Yellow Kitchen,

-Chrissy


February 22, 2011

Vietnamese Shrimp Spring Rolls

My mom has a fabulous friend named Thuy. Thuy makes really, really good spring rolls. Thuy is also a hairdresser. And she does nails.

IMG_2759

This weekend I went home to spend time with the fam and Thuy taught me how to make Vietnamese Spring Rolls, painted my nails and put highlights in my hair! Thanks Thuy.

IMG_2766

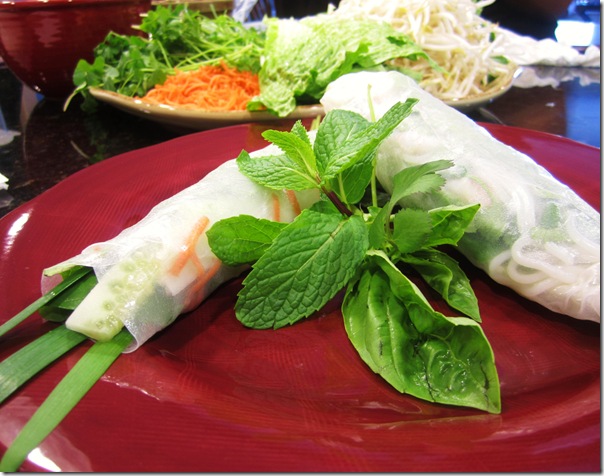
Now my friends. I will teach YOU how to make the best Vietnamese Spring Rolls you will ever lay your mouth on. It just might be impossible for you to order these at restaurants ever again after you make your own.

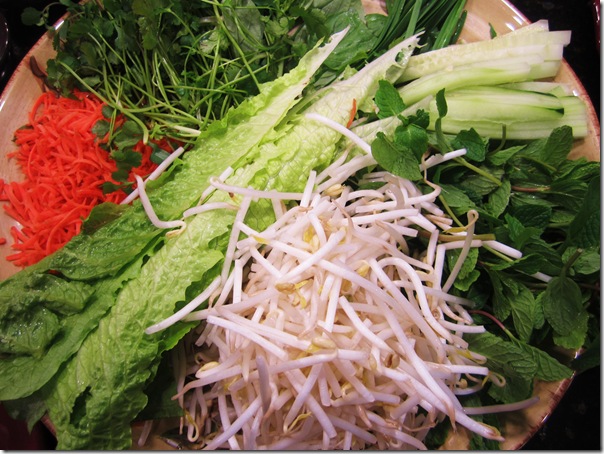
Mint, basil, cilantro, spicy chives, cucumber, carrot, lettuce, bean sprouts, and shrimp. All these ingredients are so fresh and crispy, it just might make the most perfect lunch ever.

IMG_2764

And the dipping sauce. Oooo that sauce. It was so zesty and flavorful. The perfect pairing for the fresh veggies and shrimp that are all rolled up in rice paper.

I was scared to try it after Thuy told me where fish sauce comes from. Don’t Google it – you will regret it. Don’t smell it either. Just know that it tastes good and use it.

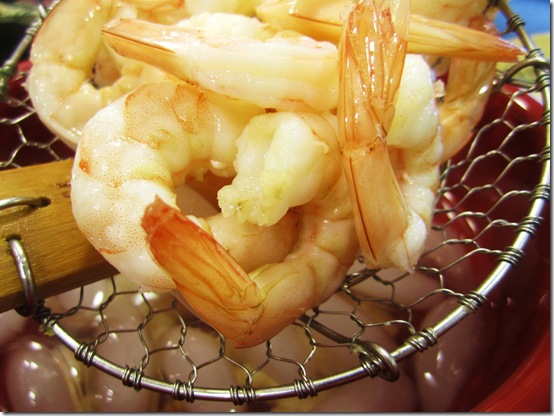
Boil your shrimp and toss them in ice water to stop the cooking and create the crunch factor.

IMG_2739

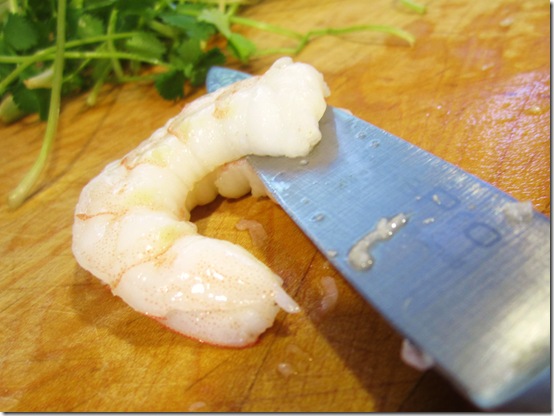
Slice the shrimp in half.

IMG_2748

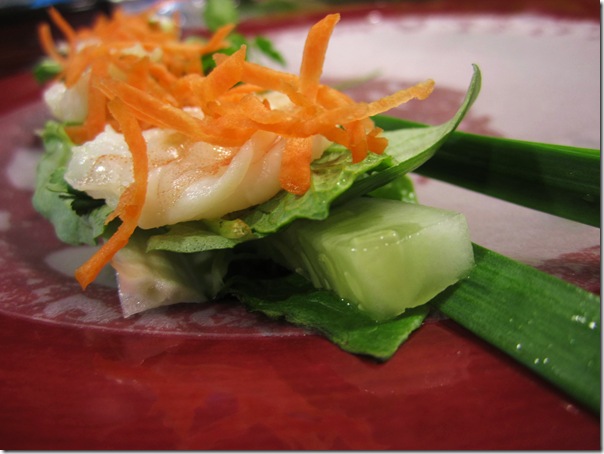
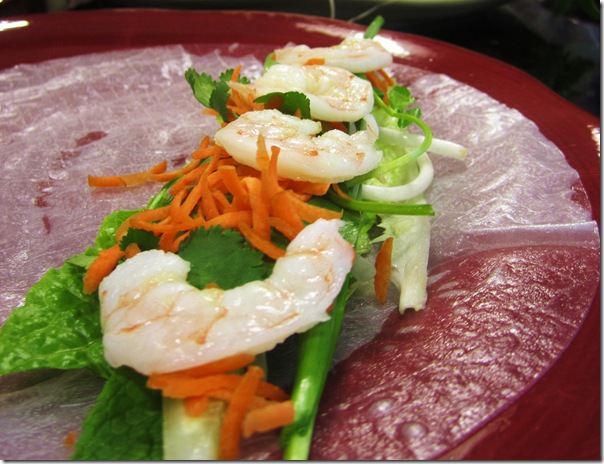
We also split the lettuce down the middle so that it laid flat inside the roll.

IMG_2758

Rice noodles are also traditionally added to these rolls. I opted out this time because the noodles are filling and frankly, I needed to to save room so I could eat more of spring rolls.

Shrimp Spring Rolls

makes approximately 12 rolls

Ingredients

24 shrimp, split length-wise

1/2 cucumber, julienned

1 carrot, julienned or grated

2 cups bean sprouts

1 bunch mint

1 bunch cilantro

1 bunch basil

1 bunch spicy chives

6-8 leaves lettuce, split down the middle – romaine or red leaf

10-12 sheets rice paper

Directions

Boil a pot of water. Add the shrimp and boil for 2-3 minutes, until pink. Pour into an ice bath. Remove the tail and halve the shrimp.

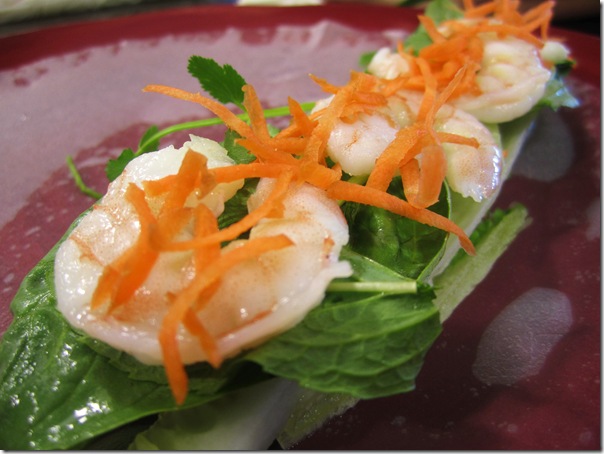
Wet your rice paper. Layer on the veggies. Typically, lettuce is first then the herbs – stems and all. Then add the cucumber and carrot. Top it off with your halved shrimp pieces and roll it up.

Dipping Sauce

6 servings

Ingredients

2-3 cloves of garlic

1 small jalapeno

1/4 cup lime juice

2-3 tablespoons sugar

1/4 + tablespoon cup fish sauce

Directions

Mash garlic and jalapeño together with mortar and pestle. Add sugar. Pour in fish sauce and mix.

IMG_2769

From the Little Yellow Kitchen,

Lauren

February 22, 2011

Pumpkin Spice Snickerdoodles

Get excited. Some steamy snickerdoodles are coming at ya! This is the classic snickerdoodle recipe, with a slight spin on it. By kicking up the cinnamon sugar coating with some pumpkin spice, these snickerdoodles truly come alive…and leave you with the reminiscent taste of the holidays. What could possibly be better? I don’t know about you, but I am obsessed with all things spice. For example, I am really not a fan of fru fru drinks at Starbucks–normally I stick with the Americano or drip coffee–but as soon as the holiday season comes around and the Pumpkin Spice Latte and Gingerbread Latte hit the menu, I can’t help but to drag myself in there and order the ridiculously overpriced, and over-caloried drink. Why? Because they are just so darn delicious, end of story. Anyways, as I put an end to my tangent, I do love the holiday spice, which is why these snickerdoodles are near and dear to my heart…or should I say sweet tooth?

Here’s the method:

First, combine all the wet and dry ingredients, as described in the directions below. The dough should be firm, before rolling into balls. If it’s not, just cover it with plastic wrap and throw it in the fridge for an hour.

Next, combine the sugar and spice, and drop the dough ball into the heavenly mixture.

Now, get the ball rollin’. As Spongebob Squarepants would say, “bring it arrrround town.” Yes, that show is still a favorite.

Completely coat the dough with sugar and spice. Sometimes, I even dip it twice to make sure every inch is covered. But shhhhhh that’s a secret. No one has to know.

Finally, place on the cookie sheet and pop in the oven for 8-10 minutes and look just how lovely they will turn out!

Just an FYI, these little beauties may tempt you to eat them all up right off the spatula, so brace yourself. Snickerdoodles are always the best right out of the oven! However, the great thing about this recipe is that even after a few days they stay soft and chewy, so they will be tasty up until the last one in the jar.

Ingredients:

  • 2 3/4 cups flour
  • 1/4 tsp salt
  • 2 tsp baking powder
  • 1 cup (2 sticks) unsalted butter, softened
  • 1 1/2 cups  sugar
  • 2 large eggs

1 tsp pure vanilla extract

Coating:

  • 1/3 cup sugar
  • 2 tsp pumpkin pie spice

*Little Yellow Note: I halved this recipe to make a small batch so I would have half as many reasons to eat junk food. I just made sure to keep the same amount of vanilla, because it is such a lovely ingredient.

Directions:

1. preheat oven to 400 degrees F

2.  In a bowl mix together the flour, salt, and baking powder. Sifting these into the bowl is a grand idea, to chase away those clumps!

3. Beat the softened butter and sugar until smooth, a couple minutes will do. Add each egg one at a time, beating well. Add the vanilla extract. Add the flour mixture and beat until the dough is smooth. If the dough is soft, cover and refrigerate until firm (about an hour)

4. Shape the dough into 1 inch round balls, or whatever size you would like them to be, just make sure that they are consistent, to ensure even baking.

5. Once shaped, drop them into the bowl with the combined sugar, cinnamon, and pumpkin spice.

6. Roll the dough balls in the sugar spice mixture and place on the cookie sheet, spacing them an inch or two apart.

7. Bake the cookies for about 8 – 10 minutes, or until the edges are golden brown. The edges will be firm and the centers will be a little soft, this is what you will want. Remove from oven and place on a torn open brown paper bag (or wire rack, if you are fancy and have one of these).

From the Little Yellow Kitchen

-Chrissy

February 20, 2011

Baked Ham & Egg Cuplet

These just might be the cutest little breakfast cuplets ever. Not to mention how tasty they are. My dad probably would have eaten 5 or 6 if I had made enough of them.

IMG_2733

Adorable, right? And so simple. My friend Carolina sent me a link to this recipe from Yumsugar and I have literally been thinking about them all week.

IMG_2725

You can make these in little ramekins or a muffin tin. I’ve been using ramekins a lot lately…why is everything in a ramekin so adorable? I love mini foods.

IMG_2730

Cheese and green onion were the only toppings my mom had on hand. Next time, I want to add a layer of sautéed mushrooms and maybe a little wilted spinach. They shall be called omelet cuplets. Let me know if you test it out!


IMG_2731

INGREDIENTS

1 egg

1 thin slices of deli ham (preferably round- I only had rectangles on hand)

sprinkle of cheese

sprinkle of diced scallions

Salt and Pepper

DIRECTIONS

Preheat the oven to 400.  Spray a muffin tin with cooking spray.  Lay a piece of ham in the ramekin of muffin tin.  Crack one egg into the hole and sprinkle with salt and pepper.
Bake the egg for 12-14 minutes, cover with foil if the ham begins to burn on the edges- although I found the crispy part to be particularly tasty. Remove the egg and top with grated cheese and scallions.  Add a layer of sautéed mushrooms and/or spinach for an extra little zest.

IMG_2733

From the Little Yellow Kitchen,

Lauren